How do you start off your month?
I, for one, like starting off a new month prepared. Usually, I take a few days before a new month starts to sit down with my planner and map out several important things. This way, I always know what to expect and what to prepare for. At a glance, I will already be able to see how busy I will be.
Since I’ve been doing this for years, I already have a routine in place for monthly planning. Having a routine is very helpful because it helps me not to forget things.
My Montly Planning Routine
How exactly do I plan my month?
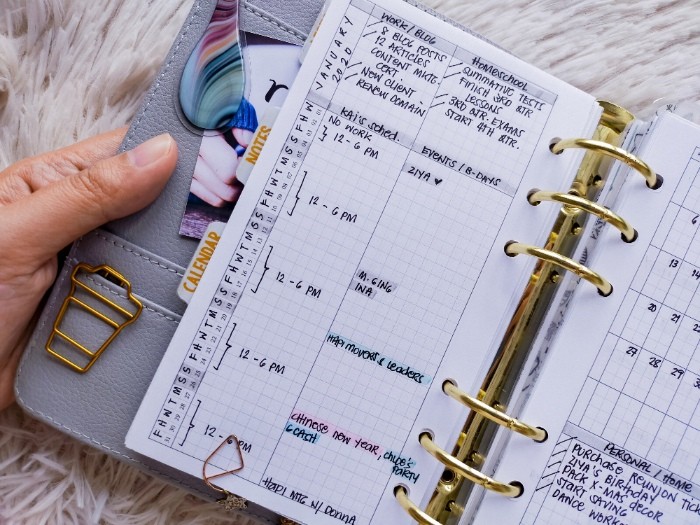
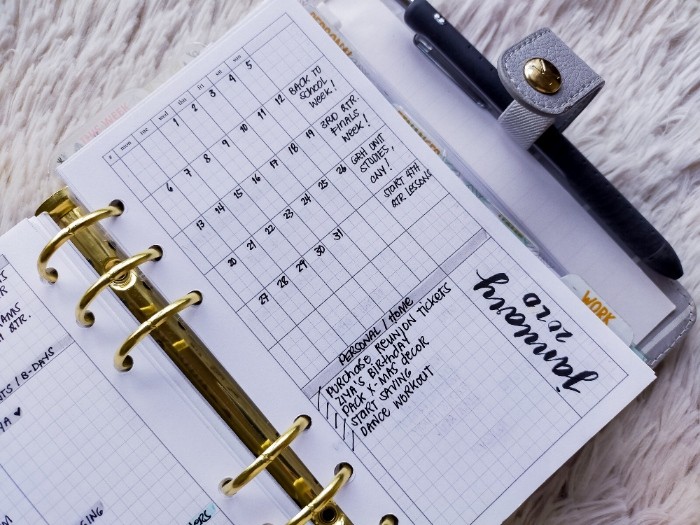
I started by choosing a monthly insert for my planner. I did this at the start of the year. Let me show you my monthly calendar for this month, January.
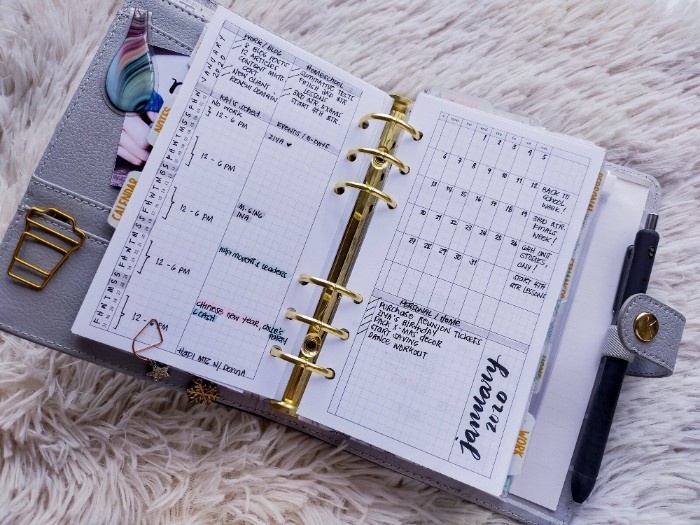
As you can see, I am using a Month on Two Page insert in my ring planner (by Peanuts Planner Co.) to map out my month. I chose this particular insert because it has enough space for everything that I wanted to jot down. It’s so functional that I plan on using the same insert every month for the rest of the year.
As soon as my monthly pages were in place, I jotted down all the important dates I already knew were fixed such as birthdays, anniversaries, and holidays. I did this for all the months. This way, my monthlies are already semi-ready when I start planning for each month.
Once I start planning, that’s when I plug in the following things:
- Goals for Work, Home / Personal, and Homeschool
- Hubby’s work schedule (This varies every month.)
- Events we plan to attend (school, work, parties, etc)
- Deadlines
- Bills Due
When I’m done with this, I then set up my monthly calendar for work, as well as all of my monthly trackers for health, finance, and chores.
Of course, it goes without saying that my monthly calendar looks this way because it is customized to my needs. Once you set up yours, it may or may not look different.
Monthly Planning Tips and Tricks
I’ve been monthly planning for many years. Over the years, I’ve already learned what works for me and what doesn’t. With that said, allow me to share with you some of my tips and tricks.
- It’s helpful to first list the items you want to track on your monthly spread even before you purchase a monthly insert or planner. This way, you’d know exactly how much space you will need and what layout would work for you.
- Keep your list in your planner. This will help you remember what else you need to jot down on your montly spread once you start planning. Looking at this list while you plan becomes part of your routine.
- The most common monthly layout is the calendar view. It’s what I’ve used many times in the past. However, don’t get stuck using that if it’s not enough for what you need. There are many other layouts out there such as the one I’m currently using.
- It helps to have a layout that will let you separate items into categories so that you can easily view them. If not, you can color code each category instead. I use both of these techniques.
- If you decide to color code, keep a color coding guide in your planner as well so that you won’t forget what category each color is for.
- If there’s an item with a date that’s not yet set in stone, consider writing it down on a Post-it first and stick it on top of your monthly insert. That way, you won’t need to erase anything and make your monthly calendar messy. Alternatively, you can use a Frixion pen too so that you can actually erase your writing if you need to.
- Make time before each month to sit down and actually fill up your monthly planner. If you’re not used to this, it might take a while for you to get into the habit. However, it’s one worth keeping. As with all habits, it’s just a matter of discipline.
Monthly planning can help prepare you for the month ahead so that you don’t need to go into it not knowing what to expect or to prepare for. Just remember that there’s no one size fits all in the world of planning. Don’t hesitate to try new systems if one doesn’t work for you.
I ♡ this